Setting up your HP LaserJet Pro M12A driver doesn’t have to be complicated. This guide walks home users, office workers, and small business owners through the complete HP LaserJet Pro M12A driver installation process from start to finish.
You’ll learn how to download the official HP LaserJet Pro M12A driver from HP’s website and install it using both automatic and manual methods. We’ll also cover essential HP printer driver troubleshooting tips to fix common setup problems, plus show you how to configure your printer settings for optimal performance.
By the end of this HP printer driver installation guide, your HP LaserJet Pro M12A will be ready to print from any Windows device on your network.
Verify operating system compatibility
Before downloading your HP LaserJet Pro M12A driver, check if your computer runs a supported operating system. This printer works with Windows 11, Windows 10, Windows 8.1, Windows 8, Windows 7, and Windows Vista (32-bit and 64-bit versions). Mac users need macOS 10.12 Sierra or newer versions. You can find your system details by right-clicking “This PC” on Windows or clicking the Apple menu and selecting “About This Mac” on macOS.
Confirm available storage space
Your computer needs enough free space for the HP LaserJet Pro M12A driver download and installation files. The driver package typically requires 150-200 MB of available disk space during the installation process. Check your storage by opening File Explorer on Windows and clicking “This PC” to view drive capacity, or go to Apple menu > About This Mac > Storage on Mac systems.
Download the Official HP LaserJet Pro M12A Driver
Visit HP’s official support website
Navigate to HP’s official support website at support.hp.com to ensure you’re downloading authentic HP LaserJet Pro M12A driver software. The official HP support portal provides the most current and secure driver versions, protecting your system from potentially harmful third-party downloads that might contain malware or outdated files.
Locate your printer model
Use the search function on HP’s support page to find your specific printer model by typing “HP LaserJet Pro M12A” in the search bar. The search results will display your exact printer model along with available support resources. Click on your printer model to access the dedicated support page containing driver downloads, manuals, and troubleshooting guides specifically designed for the M12A series.
Select the correct driver version
Choose the appropriate HP LaserJet Pro M12A driver download based on your operating system and architecture. The support page automatically detects your system specifications, but you can manually select your OS version (Windows 10, 11, macOS, etc.) and bit version (32-bit or 64-bit). Review the driver release notes to understand new features, bug fixes, and compatibility improvements included in each version.
Download the driver package
Click the download button for your selected HP LaserJet Pro M12A driver installation package. The file typically downloads as an executable (.exe) or installer package depending on your operating system. Save the driver file to an easily accessible location like your Downloads folder or desktop for quick access during the HP printer driver setup process.
Install the Driver Using Automatic Methods
Run the downloaded driver installer
Double-click the HP LaserJet Pro M12A driver file you downloaded to launch the installation wizard. The installer will automatically detect your operating system and begin the HP LaserJet Pro M12A driver installation process. Make sure to run the installer as an administrator by right-clicking and selecting “Run as administrator” to avoid permission issues during the HP printer driver setup.
Follow the setup wizard prompts
The HP LaserJet Pro M12A setup wizard will guide you through each step with clear instructions. Accept the license agreement, choose your installation preferences, and select the connection method (USB or wireless). The wizard automatically configures the HP LaserJet Pro M12A Windows driver settings based on your system requirements, making the process straightforward even for first-time users.
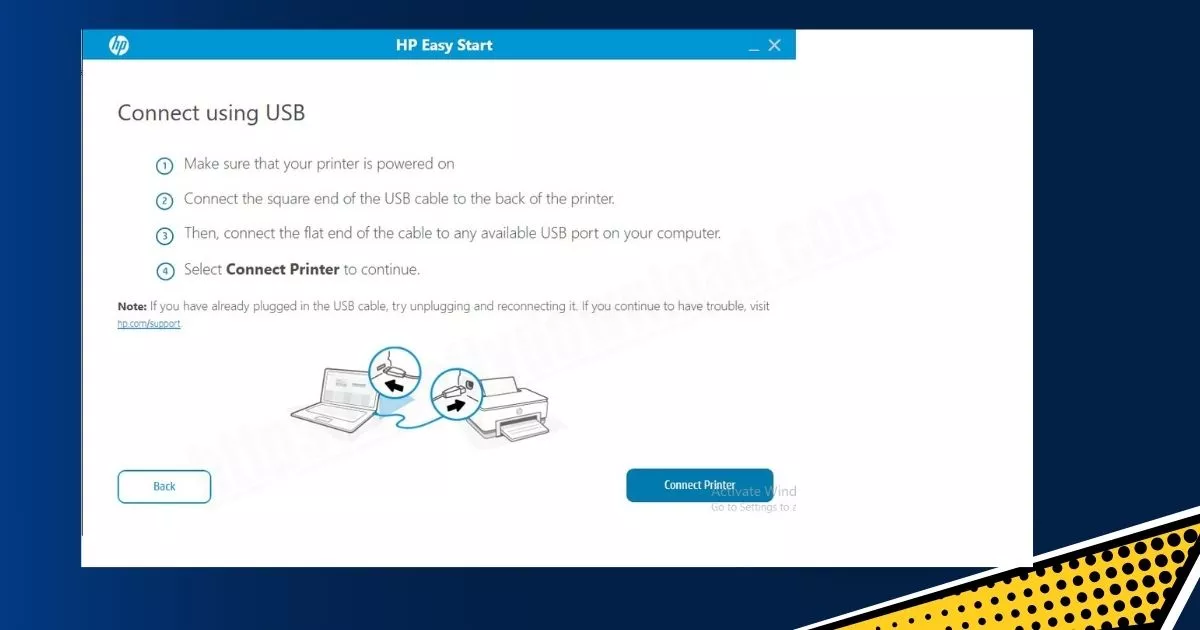
Connect your printer when prompted
When the installer requests printer connection, power on your HP LaserJet Pro M12A and connect the USB cable to your computer. For wireless setup, ensure your printer and computer are on the same network. The system will automatically detect your printer and establish communication for proper driver configuration.
Complete the installation process
The final installation steps include driver verification and test page printing. Your HP LaserJet Pro M12A driver installation will complete automatically, and Windows will register the printer in your system. The installer may restart your computer to finalize all settings and ensure optimal printer performance with your operating system.


Manual Driver Installation Through Device Manager
Access Windows Device Manager
Right-click on the Start button and select “Device Manager” from the context menu. You can also press Windows + X keys simultaneously to open the Power User menu, then click “Device Manager.” Another option is to type “Device Manager” in the Windows search bar and click on the result. Once Device Manager opens, you’ll see a hierarchical list of all hardware components connected to your computer.
Locate Unrecognized Printer Device
Look for your HP LaserJet Pro M12A under the “Printers” category or “Other devices” section. If the HP LaserJet Pro M12A driver isn’t properly installed, the device might appear with a yellow warning triangle or be listed as “Unknown device.” The printer may also show up under “Universal Serial Bus controllers” if connected via USB. Expand these sections by clicking the arrow next to each category to find your printer.
Update Driver Through Browse Option
Right-click on the unrecognized HP LaserJet Pro M12A device and select “Update driver” from the dropdown menu. In the dialog box that appears, choose “Browse my computer for driver software” instead of the automatic search option. This manual approach gives you complete control over the HP LaserJet Pro M12A driver installation process and ensures you’re using the specific driver files you downloaded.
Point to Downloaded Driver Files
Click “Browse” and navigate to the folder where you saved the downloaded HP LaserJet Pro M12A driver files. Select the folder containing the extracted driver files and click “OK.” Make sure to check the “Include subfolders” option so Windows can search through all driver components. Click “Next” to begin the HP LaserJet Pro M12A setup process using your specified driver location.
Verify Successful Installation
Windows will install the HP LaserJet Pro M12A Windows driver and display a confirmation message when complete. Your printer should now appear correctly in Device Manager without any warning symbols. Check the “Printers” section to confirm the HP LaserJet Pro M12A is listed with its proper name. You can also verify installation by going to Settings > Devices > Printers & scanners to see if your printer appears in the available devices list.
Configure Printer Settings and Test Functionality
Set HP LaserJet Pro M12A as Default Printer
After your HP LaserJet Pro M12A driver installation completes, open Windows Settings and navigate to Printers & Scanners. Locate your HP LaserJet Pro M12A in the device list and click on it. Select “Manage” and then choose “Set as default” to make it your primary printing device. This ensures all print jobs automatically route to your newly installed printer.
Adjust Print Quality Preferences
Access the printer properties by right-clicking your HP LaserJet Pro M12A in the Printers & Scanners menu and selecting “Printing preferences.” Configure paper size, orientation, and quality settings based on your typical printing needs. The HP LaserJet Pro M12A driver offers options like draft mode for everyday documents and best quality for important presentations. Save these HP LaserJet Pro M12A setup preferences to optimize your printing experience.
Print a Test Page to Confirm Operation
Click “Print a test page” from the printer properties dialog to verify your HP LaserJet Pro M12A driver setup works correctly. The test page displays printer information, color patterns, and text samples that confirm proper driver communication. If the page prints clearly without streaks or missing text, your HP printer driver setup is complete and ready for regular use.
Troubleshoot Common Installation Issues
Resolve driver conflict errors
Driver conflicts often occur when multiple printer drivers compete for system resources or when outdated drivers interfere with new installations. Start by uninstalling all previous HP LaserJet Pro M12A driver versions through Control Panel’s Programs and Features. Use Device Manager to remove any unknown or corrupted printer entries, then restart your computer before attempting a fresh HP LaserJet Pro M12A driver installation.
Check for conflicting printer software from other manufacturers that might block the HP LaserJet driver setup process. Run Windows’ built-in troubleshooter by typing “troubleshoot” in the Start menu and selecting “Printer” to automatically detect and resolve common HP printer driver conflicts.
Fix USB connection problems
USB connectivity issues can prevent proper HP LaserJet Pro M12A driver installation and printer recognition. Try different USB ports, preferably USB 2.0 or higher, and avoid using USB hubs or extension cables that might cause signal degradation. Test with a different USB cable to eliminate hardware failure as the cause.
Verify that Windows recognizes the printer by checking Device Manager for any devices with yellow warning triangles. If the printer appears as an “Unknown Device,” manually point Windows to the downloaded HP LaserJet Pro M12A driver location during the hardware installation wizard.
Address firewall blocking issues
Windows Firewall and third-party security software can block HP LaserJet Pro M12A driver installation files from communicating with system components. Temporarily disable your firewall during the driver installation process, then re-enable it once the setup completes successfully. Add exceptions for HP software and printer communication ports in your firewall settings.
Antivirus programs sometimes flag printer drivers as suspicious files and quarantine installation components. Check your antivirus quarantine folder and restore any HP LaserJet driver files that were incorrectly identified as threats before retrying the installation process.
Update Windows for compatibility
Outdated Windows systems may lack essential components required for modern HP LaserJet Pro M12A driver installation. Run Windows Update to install the latest system patches, security updates, and driver compatibility improvements. Some printer drivers require specific Windows versions or service packs to function correctly.
Install any pending Windows updates and restart your computer before downloading the HP LaserJet Pro M12A driver. Check Microsoft’s compatibility list to ensure your Windows version officially supports the printer model, as older operating systems might need alternative driver versions from HP’s legacy driver archive.
Conclusion
Getting your HP LaserJet Pro M12A up and running doesn’t have to be a headache. The key steps are straightforward: verify your system meets the requirements, grab the official driver from HP’s website, and choose between automatic installation or the manual Device Manager route. Once installed, take a moment to adjust your printer settings and run a test page to make sure everything’s working smoothly.
If you run into any hiccups during installation, don’t panic. Most common issues have simple fixes, and HP’s support resources can guide you through them. With your driver properly installed and configured, you’ll have a reliable printer ready to handle all your printing needs. Remember to keep your driver updated for the best performance and compatibility with future system updates.